- Published on
Stop Making Your S3 Buckets Public! A Guide to Presigned URLs
- Authors

- Name
- Ted
- @supasaf
A developer needs to share a file from cloud storage. What do they do? They go to the S3 console, click "Properties," "Permissions," and set the bucket to... "Public".
As a security guy, this is the moment my eye starts to twitch uncontrollably.
Making a bucket "public" is the cloud equivalent of leaving your house keys taped to the front door with a giant "COME ON IN!" sign. It's a "Resume-Generating Event," as in, you'll need to update your resume after you get fired.
The other day at work, I ran into a classic version of this problem. Algorithm team has a new service (on Tencent Cloud, actually) that generates an image. This image needs to be seen by our end user, maybe internal staff or maybe even an external partner.
So, how do you let someone access one file in a private bucket, just one time, without giving them the keys to the entire kingdom?
The answer is simple and beautiful: Presigned URLs.
To prove how cool this is, I decided to build a minimal demo from scratch using my AWS Free Tier. (Hey, you gotta keep your hands dirty, right?)
What the Heck is an S3 Presigned URL?
Think of it like a magical, single-use, self-destructing ticket to a VIP club.
- The Club (Your S3 Bucket): Is 100% private. The bouncer (AWS) checks everyone at the door.
- The Ticket (The Presigned URL): You (a trusted IAM identity) generate this special ticket. It has a cryptographic signature baked right into the URL query string.
- The Rules: The signature basically tells the bouncer: "This person is with me. Let them GET the file
order-123.jpg... but only for the next 5 minutes."
After 5 minutes, that URL is just a useless string of text (it gives a 403 Access Denied error).
In another words, your S3 bucket stays 100% private. (No, really. Don't you dare touch that public access block.)
You never share your permanent Access Keys. The signature in the URL is temporary.
Access is temporary. You set the expiration. 60 seconds? 10 minutes? You're the boss.
Access is specific. This URL might only work for a GET (download) or a PUT (upload), and only for one specific file.
Building the Fortress (with Terraform)
In the modern cloud world, we don't "click around in the console." That's called "ClickOps," and it's how mistakes happen. We use Infrastructure as Code (IaC) to build our environment so it's repeatable and secure.
Here’s my main.tf script to build a fortress-like S3 setup.
terraform {
required_providers {
aws = {
source = "hashicorp/aws"
version = "~> 5.0"
}
}
}
provider "aws" {
region = "us-east-1"
}
# Generate a random suffix to keep the bucket name unique
resource "random_id" "suffix" {
byte_length = 4
}
# Create the S3 bucket
resource "aws_s3_bucket" "demo_bucket" {
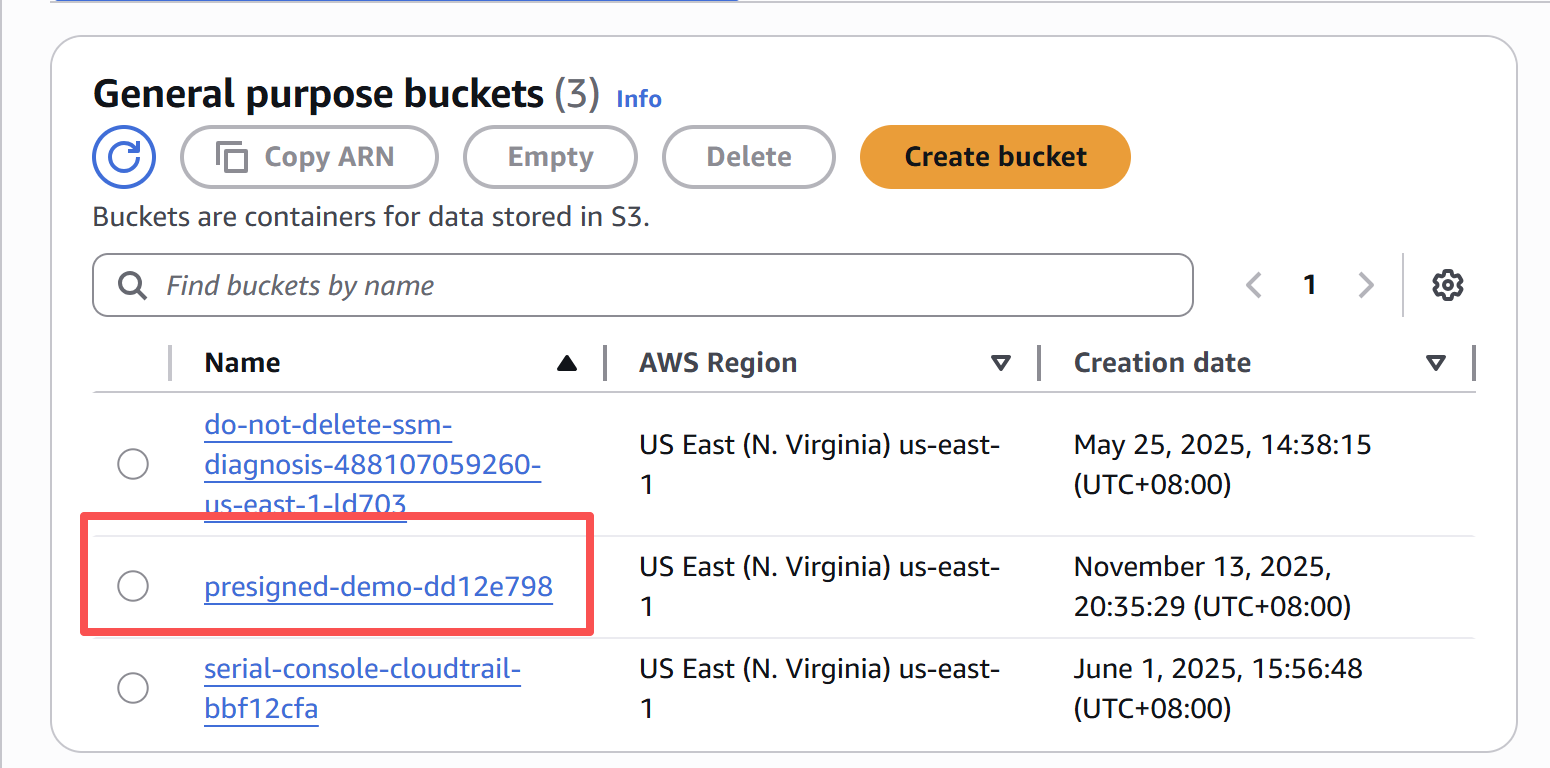
bucket = "presigned-demo-${random_id.suffix.hex}"
force_destroy = true # Good for demos, NOT for prod!
tags = {
Purpose = "PresignedURLDemo"
}
}
# BLOCK ALL PUBLIC ACCESS. This is the most important part.
resource "aws_s3_bucket_public_access_block" "demo_block" {
bucket = aws_s3_bucket.demo_bucket.id
block_public_acls = true
block_public_policy = true
ignore_public_acls = true
restrict_public_buckets = true
}
# Enable server-side encryption by default
resource "aws_s3_bucket_server_side_encryption_configuration" "demo_encryption" {
bucket = aws_s3_bucket.demo_bucket.id
rule {
apply_server_side_encryption_by_default {
sse_algorithm = "AES256"
}
}
}
# Enable versioning (good practice)
resource "aws_s3_bucket_versioning" "demo_versioning" {
bucket = aws_s3_bucket.demo_bucket.id
versioning_configuration {
status = "Enabled"
}
}
# Add a lifecycle rule to delete demo files after 7 days
resource "aws_s3_bucket_lifecycle_configuration" "demo_lifecycle" {
bucket = aws_s3_bucket.demo_bucket.id
rule {
id = "delete-after-7-days"
status = "Enabled"
filter {
prefix = "" # Apply to all objects
}
expiration {
days = 7
}
}
}
# Create an IAM user (for demo purposes)
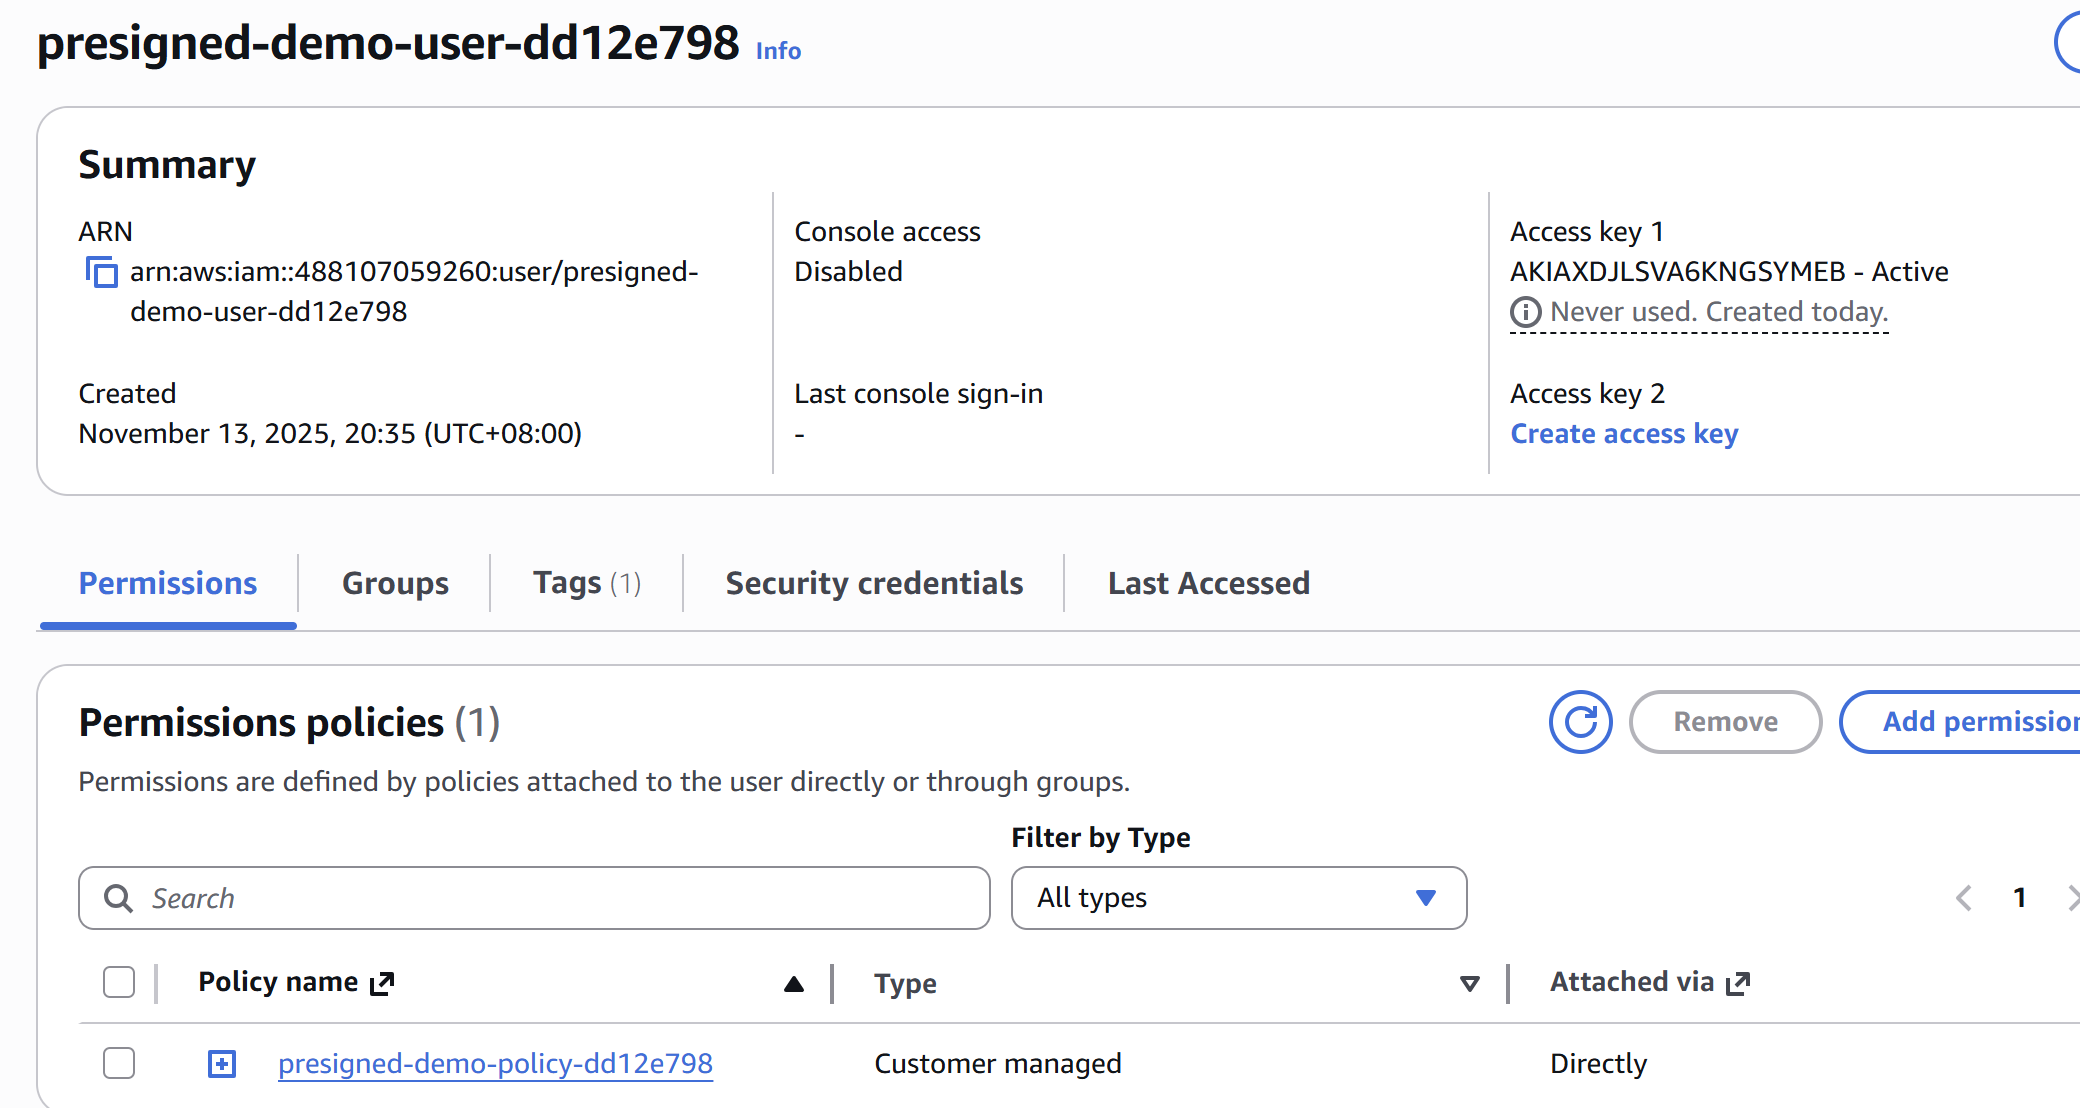
resource "aws_iam_user" "presigned_user" {
name = "presigned-demo-user-${random_id.suffix.hex}"
tags = {
Purpose = "PresignedURLDemo"
}
}
# Create a minimal IAM policy
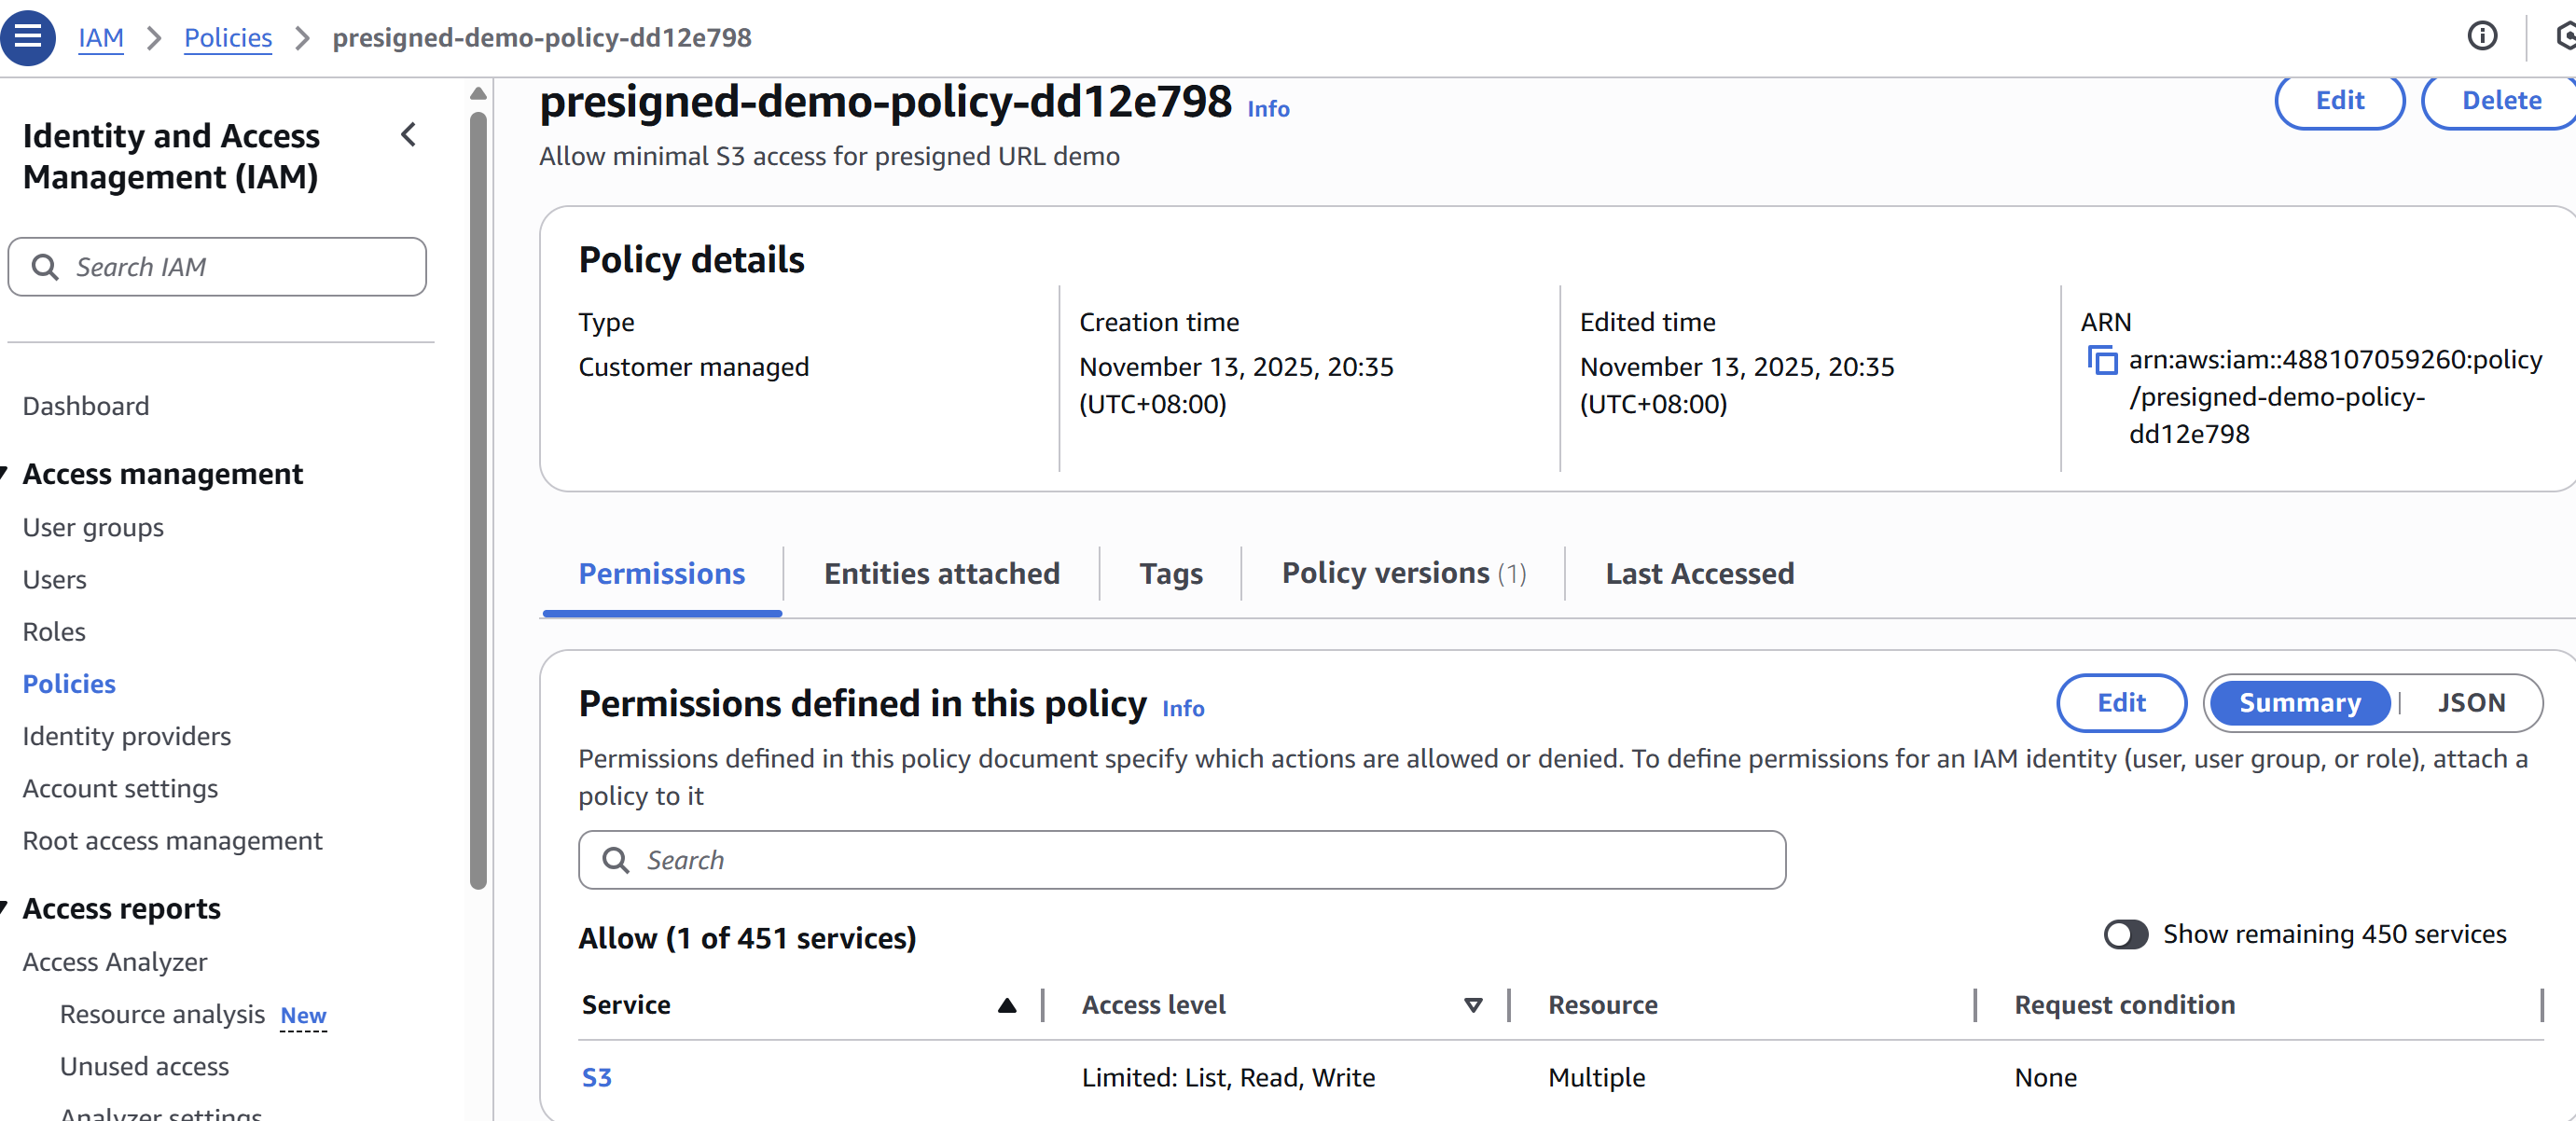
resource "aws_iam_policy" "presigned_policy" {
name = "presigned-demo-policy-${random_id.suffix.hex}"
description = "Allow minimal S3 access for presigned URL demo"
policy = jsonencode({
Version = "2012-10-17"
Statement = [
{
Effect = "Allow"
Action = [
"s3:GetObject",
"s3:PutObject"
]
Resource = "${aws_s3_bucket.demo_bucket.arn}/*" # Only on objects
},
{
Effect = "Allow"
Action = [
"s3:ListBucket"
]
Resource = aws_s3_bucket.demo_bucket.arn # Only on the bucket itself
}
]
})
}
# Attach the policy to the user
resource "aws_iam_user_policy_attachment" "attach_policy" {
user = aws_iam_user.presigned_user.name
policy_arn = aws_iam_policy.presigned_policy.arn
}
# Create access keys for the demo user
resource "aws_iam_access_key" "demo_key" {
user = aws_iam_user.presigned_user.name
}
# --- Outputs ---
output "bucket_name" {
value = aws_s3_bucket.demo_bucket.bucket
description = "S3 bucket name"
}
output "bucket_region" {
value = aws_s3_bucket.demo_bucket.region
description = "S3 bucket region"
}
output "access_key_id" {
value = aws_iam_access_key.demo_key.id
description = "AWS Access Key ID"
sensitive = true
}
output "secret_access_key" {
value = aws_iam_access_key.demo_key.secret
description = "AWS Secret Access Key"
sensitive = true
}
I run terraform apply, and poof! My environment is ready. Look at that beautiful, private, encrypted, and locked-down setup.

The "Secret Handshake" (with Python)
Okay, the fortress is built. Now I need to simulate the real business logic. I'll use Python and the boto3 library.
The script will do two things:
Act 1 (Simulate the "Algorithm Team"): Generate a presigned URL to UPLOAD a file (PUT).
Act 2 (Simulate the "End User"): Generate a presigned URL to DOWNLOAD that file (GET).
#!/usr/bin/env python3
"""
Simple S3 Presigned URL Demo
Upload and download files using presigned URLs
"""
import boto3
import requests
# ========================================
# Configuration - Replace with your values
# ========================================
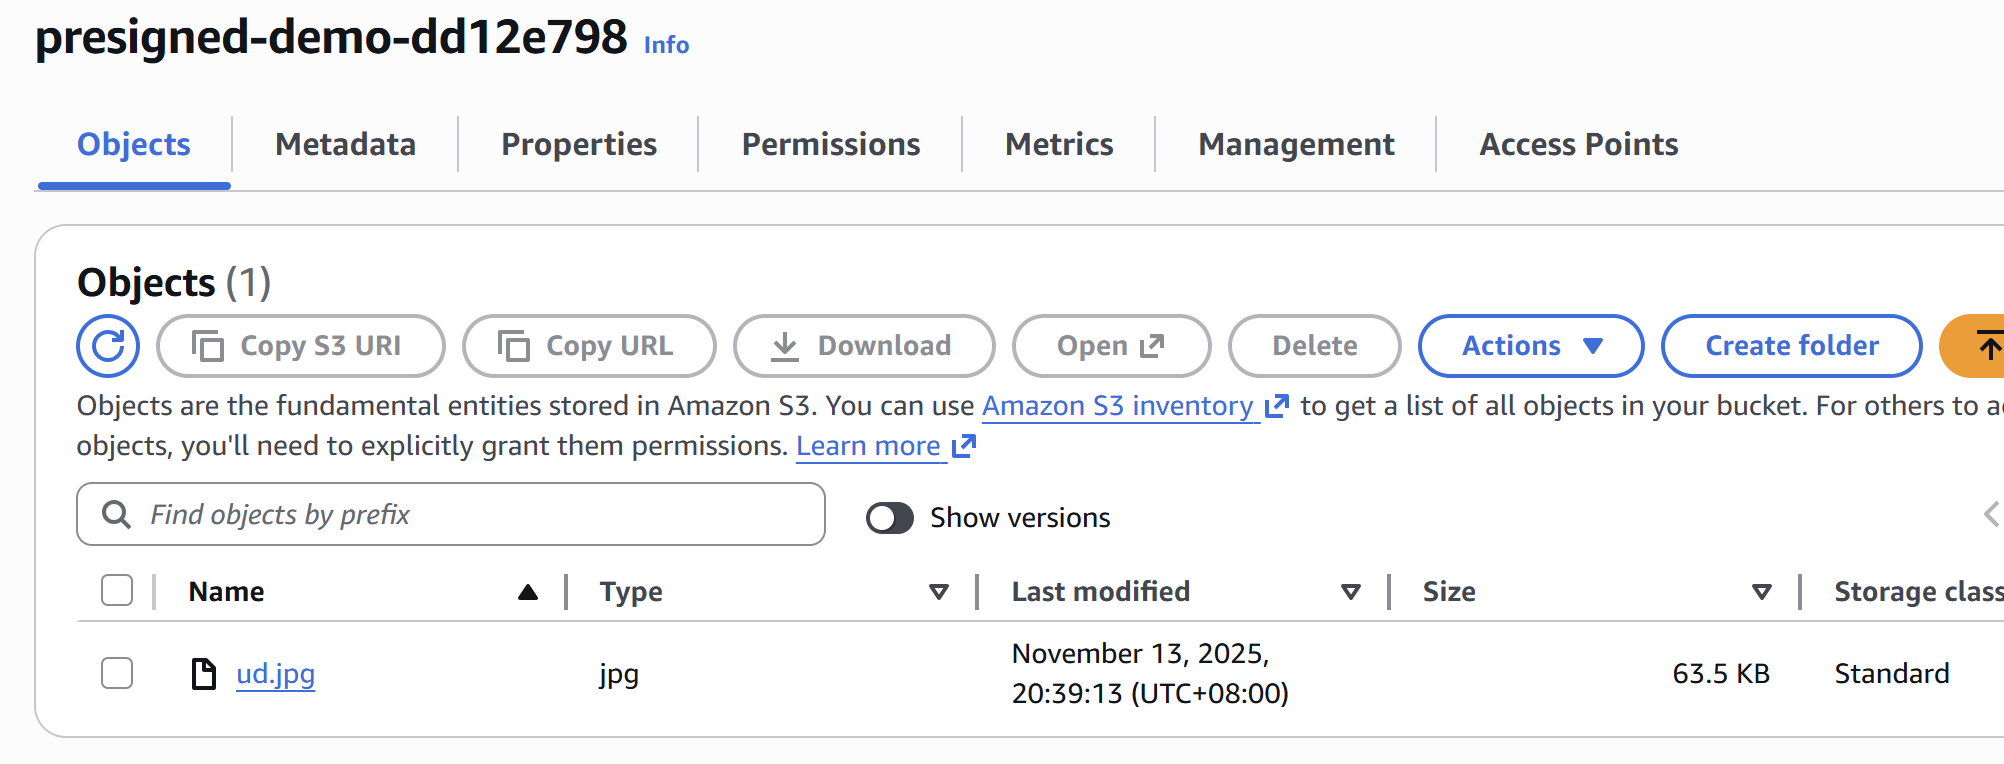
BUCKET_NAME = "presigned-demo-dd12e798" # I got this from my terraform output
REGION = "us-east-1"
LOCAL_FILE = "ud.jpg" # A test image I have
OBJECT_KEY = "ud.jpg" # The name it will have in S3
# ========================================
# Main Demo
# ========================================
def main():
print("=== S3 Presigned URL Demo ===\n")
# Create S3 client
print(f"Creating S3 client for region: {REGION}")
# Boto3 will find the keys from my ~/.aws/credentials file
s3_client = boto3.client('s3', region_name=REGION)
# Step 1: Generate presigned URL for upload (PUT)
print(f"\n1. Generating presigned URL for upload (expires in 600 seconds)...")
upload_url = s3_client.generate_presigned_url(
ClientMethod='put_object',
Params={
'Bucket': BUCKET_NAME,
'Key': OBJECT_KEY,
'ContentType': 'image/jpeg' # Important for uploads!
},
ExpiresIn=600 # 10 minutes
)
print(f" Upload URL: {upload_url[:80]}...")
# Step 2: Upload file using presigned URL
# We use 'requests' here to act like a client that does NOT have AWS keys
print(f"\n2. Uploading {LOCAL_FILE} using presigned URL...")
with open(LOCAL_FILE, 'rb') as f:
response = requests.put(
upload_url,
data=f,
headers={'Content-Type': 'image/jpeg'}
)
if response.status_code == 200:
print(f" ✓ Upload successful!")
else:
print(f" ✗ Upload failed: {response.status_code}")
print(f" Error: {response.text}")
return
# Step 3: Generate presigned URL for download (GET)
print(f"\n3. Generating presigned URL for download (expires in 300 seconds)...")
download_url = s3_client.generate_presigned_url(
ClientMethod='get_object',
Params={
'Bucket': BUCKET_NAME,
'Key': OBJECT_KEY
},
ExpiresIn=300 # 5 minutes
)
_ print(f" Download URL: {download_url[:80]}...")
# Step 4: Download file using presigned URL
print(f"\n4. Downloading file using presigned URL...")
response = requests.get(download_url)
if response.status_code == 200:
output_file = "downloaded_ud.jpg"
with open(output_file, 'wb') as f:
f.write(response.content)
print(f" ✓ Download successful!")
print(f" File saved as: {output_file}")
print(f" File size: {len(response.content)} bytes")
else:
print(f" ✗ Download failed: {response.status_code}")
if __name__ == "__main__":
main()
And look at the result! It just works.
(base) ss@ss:~/s3_1113$ python3 demo.py
=== S3 Presigned URL Demo ===

Creating S3 client for region: us-east-1

1. Generating presigned URL for upload (expires in 600 seconds)...
   Upload URL: https://presigned-demo-dd12e798.s3.amazonaws.com/ud.jpg?AWSAccessKeyId=AKIAXDJLS...

2. Uploading ud.jpg using presigned URL...
   ✓ Upload successful!

3. Generating presigned URL for download (expires in 300 seconds)...
   Download URL: https://presigned-demo-dd12e798.s3.amazonaws.com/ud.jpg?AWSAccessKeyId=AKIAXDJLS...

4. Downloading file using presigned URL...
   ✓ Download successful!
   File saved as: downloaded_ud.jpg
   File size: 65049 bytes
The requests library, which has zero idea about my AWS keys, was able to both upload and download a file to my 100% private S3 bucket. That's the magic.
OK, But How Do You Do This in Production?
My demo was great, but I used a long-term IAM User key (aws_iam_access_key) stored on my laptop.
In a real production environment... NEVER DO THIS.
Storing static, long-lived access keys in your application code is a massive security risk. If those keys ever leak, a hacker has a permanent key to your S3 bucket.
In a real, "grown-up" architecture, you use a "Signing Service" pattern.
- Create a dedicated AWS Lambda function. Its only job is to generate these presigned URLs. Let's call it the "URL-Signing-Guy."
- Give the Lambda an IAM Role (not a User!). This role is a temporary identity that the Lambda "wears" when it runs. This role has a very strict policy:
s3:GetObjectands3:PutObjectonly for your specific bucket. - Put an API Gateway in front of the Lambda. Your main application (the algorithm service) doesn't call S3 directly. It calls your own secure API endpoint (e.g., POST
/api/v1/get-upload-url). - Strengthen the S3 Bucket Policy. This is the expert-level move. You add a Bucket Policy to S3 that says: "I will only accept GetObject or PutObject requests IF they come from the 'URL-Signing-Guy' Lambda's IAM Role."